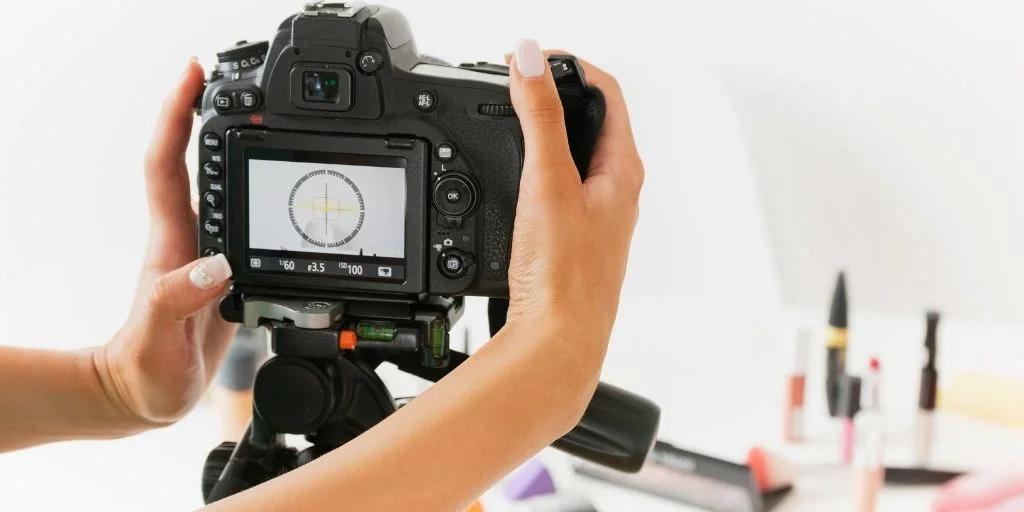
Getting your camera settings right is essential for creating clean, sharp, and consistent product photos. Whether you’re shooting simple e-commerce images or more styled visuals, understanding how each setting affects the final result helps you avoid issues like blur, noise, or inaccurate colors.
Incorrect settings, on the other hand, can lead to washed-out tones, loss of detail, or images that fail to represent the product accurately. In product photography, precision and consistency start with proper camera setup.
In this guide, you’ll learn which settings matter, how to adjust them, and how to balance them to achieve professional, reliable results.
Best Aperture for Product Photography
The best aperture for product photography typically falls between f/8 and f/11. This range provides the optimal balance of sharpness, depth of field, and detail, making it ideal for most products, from small items like jewelry to larger products like shoes or accessories. When someone asks, “What aperture for product photography should I use?” this range is considered the most reliable because it gives you maximum clarity without introducing lens softness.
What Happens If You Don’t Use the Right Aperture?
Using the wrong aperture can dramatically affect the quality of your product images:
- At too wide of an aperture (like f/1.8 or f/2.8), parts of the product fall out of focus. This creates an unprofessional look and can make customers feel uncertain about the details.
- At very narrow apertures (like f/22 or f/32), diffraction softens the image, reducing sharpness across the product.
Since product photos require accuracy and detail, the wrong aperture can undermine the entire shoot.
How to Set Up Your Aperture for Perfect Results
- Start at f/8.
Take a test shot and zoom in to examine fine details like textures, edges, and labels.
- Move to f/11 if you need a bit more depth of field.
This is especially helpful for bulkier items like cosmetics, bottles, or electronics.
- Avoid going beyond f/16, unless absolutely necessary. Diffraction becomes noticeable and may reduce clarity.
- Balance your aperture with ISO and shutter speed.
For example:
o If you use f/11, you may need more light or a slower shutter speed.
o If you must shoot at a smaller aperture but the scene gets too dark, lower the ISO before adjusting shutter.
How to Test If Your Aperture Setting Works
- Zoom in 100% and check if the product edges are crisp.
- Look at front and back areas of the product, are both sharp?
- If parts are soft, narrow the aperture slightly.
- If the whole image looks slightly hazy, you may have gone too narrow.
What If You Can’t Use the Ideal Aperture?
Sometimes you’re limited by lighting, your lens, or camera capabilities.
If you can’t use f/8–f/11:
- Use f/5.6 and increase the distance between the camera and product.
- Use focus stacking for small products like jewelry or watches.
- Add more light to maintain sharp results without raising ISO.
Comparison Images (Using vs. Not Using the Setting)
- Correct aperture (f/8–f/11): Fully sharp product, clean edges, controlled depth.
- Incorrect aperture (f/2.8 or f/22): Either shallow, blurred parts OR overall softness from diffraction.
Best aperture for product photography for beginners?
Start with f/8, then adjust to f/11 if you need more depth.
What is the best f-stop for product shots?
The best f-stop is typically f/8–f/11 for sharp, consistent product photos.
Best ISO for Product Photography
The best ISO for product photography is ISO 100, or the lowest native ISO available on your camera. Product photography relies heavily on clean, noise-free images, and using a low ISO ensures maximum clarity. When someone asks, “What ISO should I use for product photography?”, the correct answer is always: as low as possible.
What Happens If ISO Is Set Incorrectly?
Wrong ISO settings introduce noise, grain, and color distortion:
- Higher ISO (400–1600) leads to visible grain and reduces the premium look of the product.
- Noise affects color accuracy, especially critical for brands.
- It also reduces dynamic range, making shiny or reflective items harder to control.
How to Set ISO Correctly
- Always start at ISO 100.
- Use external lighting or strobes to brighten your scene instead of raising ISO.
- If you must increase ISO, never go higher than ISO 400 for product shots.
- Use a tripod so you can keep ISO low while reducing shutter speed.
How to Test Whether Your ISO Setting Is Working
- Zoom into shadow areas first. Noise usually appears there.
- Look for color blotches or grain on smooth surfaces like plastic or metal.
- Take a shot at ISO 100 and ISO 400 for comparison, if the difference is visible, stay at ISO 100.
What If You Can’t Use Low ISO?
If lighting is limited:
- Reduce shutter speed (use a tripod to avoid motion blur).
- Increase aperture slightly (from f/11 to f/8).
- Add a continuous light or LED panel.
Comparison (Using vs. Not Using the Setting)
- Correct ISO (100): Clean, crisp image with perfect colors.
- Incorrect ISO (800+): Grainy texture, muddy shadows, reduced detail.
Shutter Speed for Product Photography
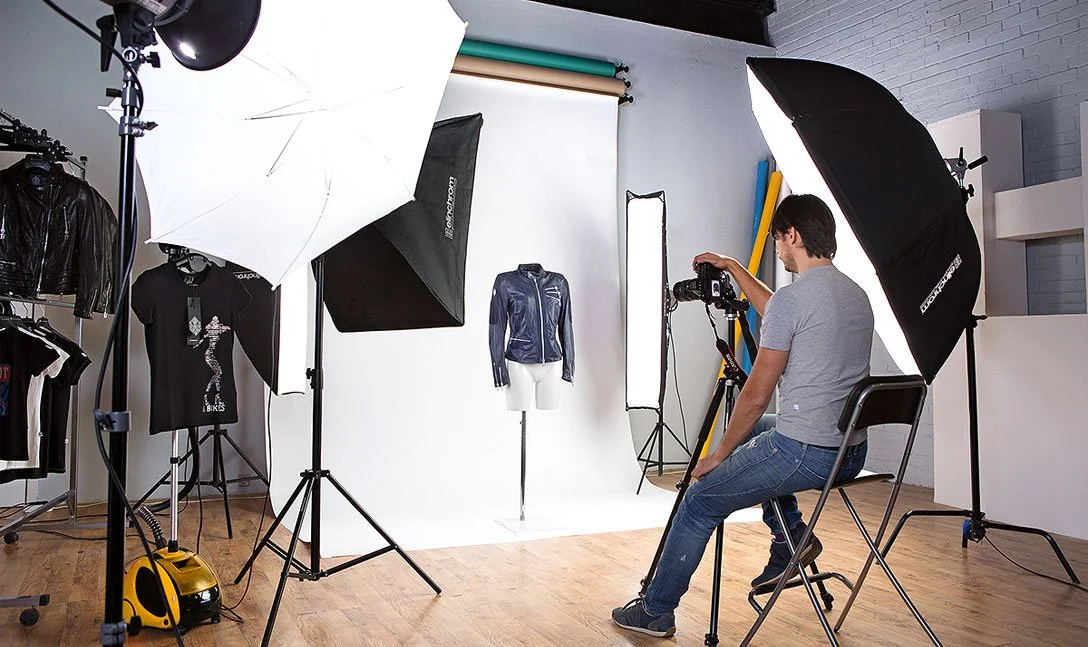
The best shutter speed for product photography is typically between 1/60 and 1/200, depending on your lighting setup. Since product photography happens in a controlled environment, usually with a tripod, you don’t need extremely fast shutter speeds. Instead, your goal is to avoid any camera shake while allowing enough light into the sensor.
When someone asks, “What shutter speed is best for product photography?” the answer depends on whether you’re using natural light, continuous light, or strobes. But in general:
- 1/125 – 1/200: Perfect for flash or strobe product photos
- 1/60 – 1/100: Ideal for continuous or natural light (with tripod)
What Happens If Shutter Speed Is Incorrect?
- Too slow: Even on a tripod, pressing the shutter button can cause micro-shake. This makes the product look blurry or soft.
- Too fast: The image may become underexposed, especially with soft continuous lighting.
Because customers evaluate product quality based on sharpness, wrong shutter speed can instantly make an image look unprofessional.
How to Set Shutter Speed Correctly
- Use a tripod so you can work with slower speeds without shake.
- Turn on the 2-second timer or use a remote to avoid vibration.
- For strobes, keep shutter speed between 1/125 and your camera’s sync speed.
- For natural light, start at 1/60 and adjust based on exposure.
How to Test Shutter Speed
- Zoom into small details like textures, patterns, or product labels.
- If the edges look soft, increase shutter speed slightly.
- If the exposure drops, adjust aperture or lights instead of raising ISO.
What If You Can’t Use the Ideal Shutter Speed?
- Lower the ISO to maintain quality.
- Adjust aperture to let in more light.
- Add another continuous light or reflector to increase brightness.
- Use the camera’s image stabilization, but still rely on a tripod for best results.
Comparison (Using vs. Not Using the Setting)
- Correct shutter speed (1/125): Sharp, crisp, controlled highlights.
- Incorrect shutter speed (1/15): Blurry edges, soft textures, unusable result.
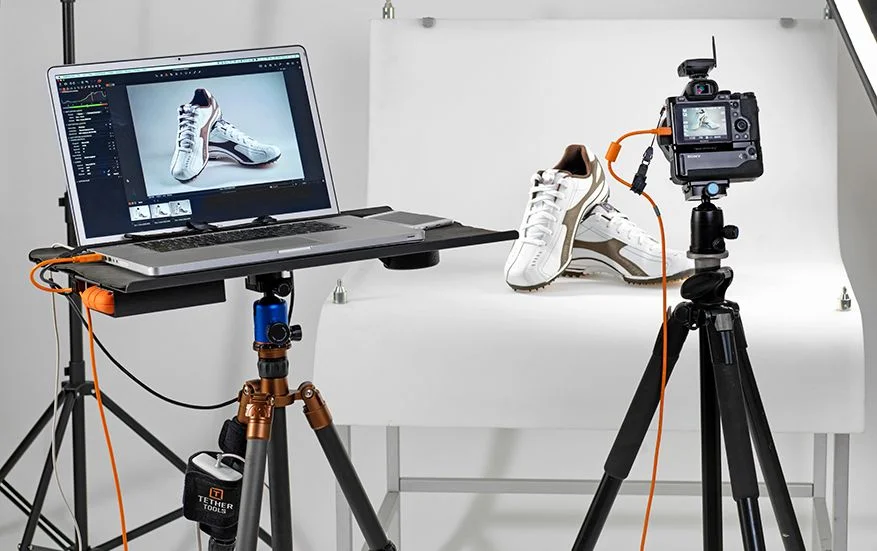
Image Format Setting for Product Photography
The best file format for product photography is RAW. Shooting RAW preserves maximum detail and gives you full control over white balance, shadows, highlights, and color accuracy during editing. For professional product photography, whether for e-commerce, packaging, or print, RAW is the industry standard.
JPEG should only be used if:
- You are shooting high-volume automated product photography
- You need fast delivery with minimal editing
- Storage space is limited
What Happens If You Don’t Shoot in RAW?
- You lose dynamic range
- Colors become harder to correct
- White balance may become inaccurate
- Image quality reduces if heavy editing is needed
This makes it harder to achieve consistent, premium-looking products.
How to Set Image Format Correctly?
- Go to your camera’s image quality settings
- Select RAW or RAW + JPEG
- Make sure you have enough storage and backup space
What If You Can’t Use RAW?
If your workflow requires JPEG:
- Shoot at the highest JPEG quality
- Double-check white balance before shooting
- Use a consistent lighting setup
- Lower ISO as much as possible
Comparison (Using vs. Not Using the Setting)
- RAW: Deep detail, rich colors, flexible editing
- Incorrect (JPEG only): Reduced detail, limited editing options, banding in shadows
Best Focus Mode for Product Photography (MF)
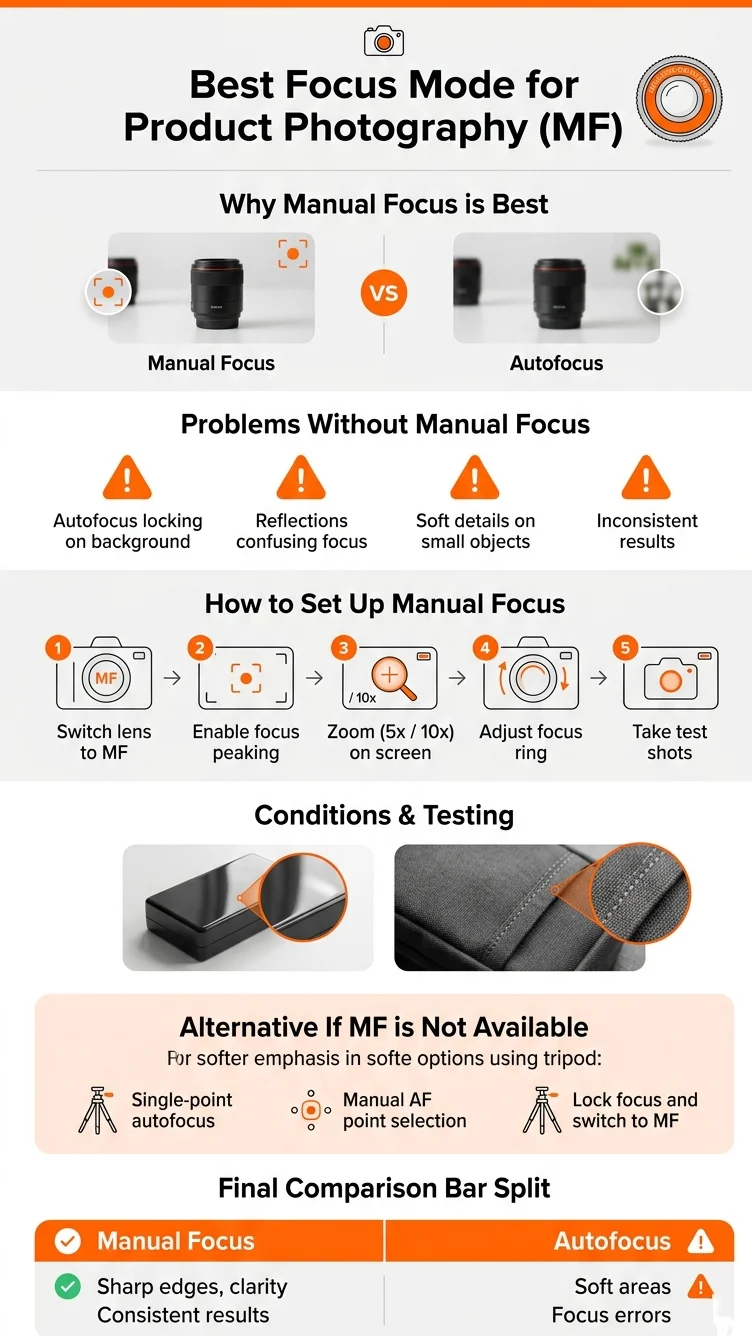
The best focus mode for product photography is Manual Focus (MF). Autofocus can miss small details or focus on the wrong part of the product, especially with shiny or textured surfaces. Manual focus ensures maximum precision.
What Happens If You Don’t Use Manual Focus?
- Autofocus may lock onto background objects
- Reflective surfaces confuse AF sensors
- Tiny foreground objects may look soft
- Your image may lose professional consistency
Manual focus prevents these issues entirely.
How to Set Up Manual Focus
- Switch your lens to MF
- Enable Focus Peaking (if available)
- Use Live View and zoom in digitally at 5x or 10x
- Adjust the focus ring until the product edges are sharp
- Capture 2–3 test shots and compare
Conditions and Tests
- On glossy surfaces, test focus by checking where light reflections fall
- On textured products, examine micro-details such as stitching or surface grain
- If multiple areas need to be sharp, consider focus stacking
What If You Can’t Use MF?
- Use Single-point autofocus
- Choose the exact AF point manually
- Use AF only for initial focus, then switch to MF and lock the focus
- Use a tripod to eliminate movement
Comparison (Using vs. Not Using the Setting)
- Manual focus: Sharp edges, consistent clarity, no focusing errors
- Autofocus: Inconsistent results, soft areas, focus drifting
Best White Balance Setting for Product Photography
The best white balance setting for product photography is Custom White Balance using a gray card. Color accuracy is essential in product photos, especially for apparel, cosmetics, jewelry, or branded products.
Incorrect white balance leads to inaccurate product representation, which can cause returns and reduce trust.
When people ask, “What WB setting for product photography is best?” the answer is straightforward:
- Custom WB
- Kelvin mode (between 5000K–5600K for studio lights)
What Happens If WB Is Incorrect?
- Product colors appear too warm or too cool
- Whites turn yellow, blue, or green
- Editing becomes difficult and time-consuming
- Brand colors may look inaccurate
- The overall image loses professionalism
How to Set Up White Balance Correctly
- Place a neutral gray card in the scene
- Fill the frame with the card
- Capture a reference photo
- Set Custom WB from the menu
- Alternatively, switch to Kelvin and set 5000–5600K for daylight-balanced lights
How to Test Your WB Setting
- Compare the product color to the real item
- Look at whites, are they truly white?
- If skin tones (model shots) look too warm or pale, adjust Kelvin ±200K
- Check shadow colors; inaccurate WB often shows there first
What If You Can’t Use Custom WB?
- Use Daylight mode (usually around 5200K)
- Avoid Auto White Balance, it changes from shot to shot
- Keep lighting consistent to make WB easier to control
- Use a preset Kelvin value rather than AWB
Comparison (Using vs. Not Using the Setting)
- Correct WB: True-to-life colors, clean whites, accurate branding
- Incorrect WB: Yellowish or bluish tint, misleading product colors
Best Camera Light-Control Settings for Product Photography
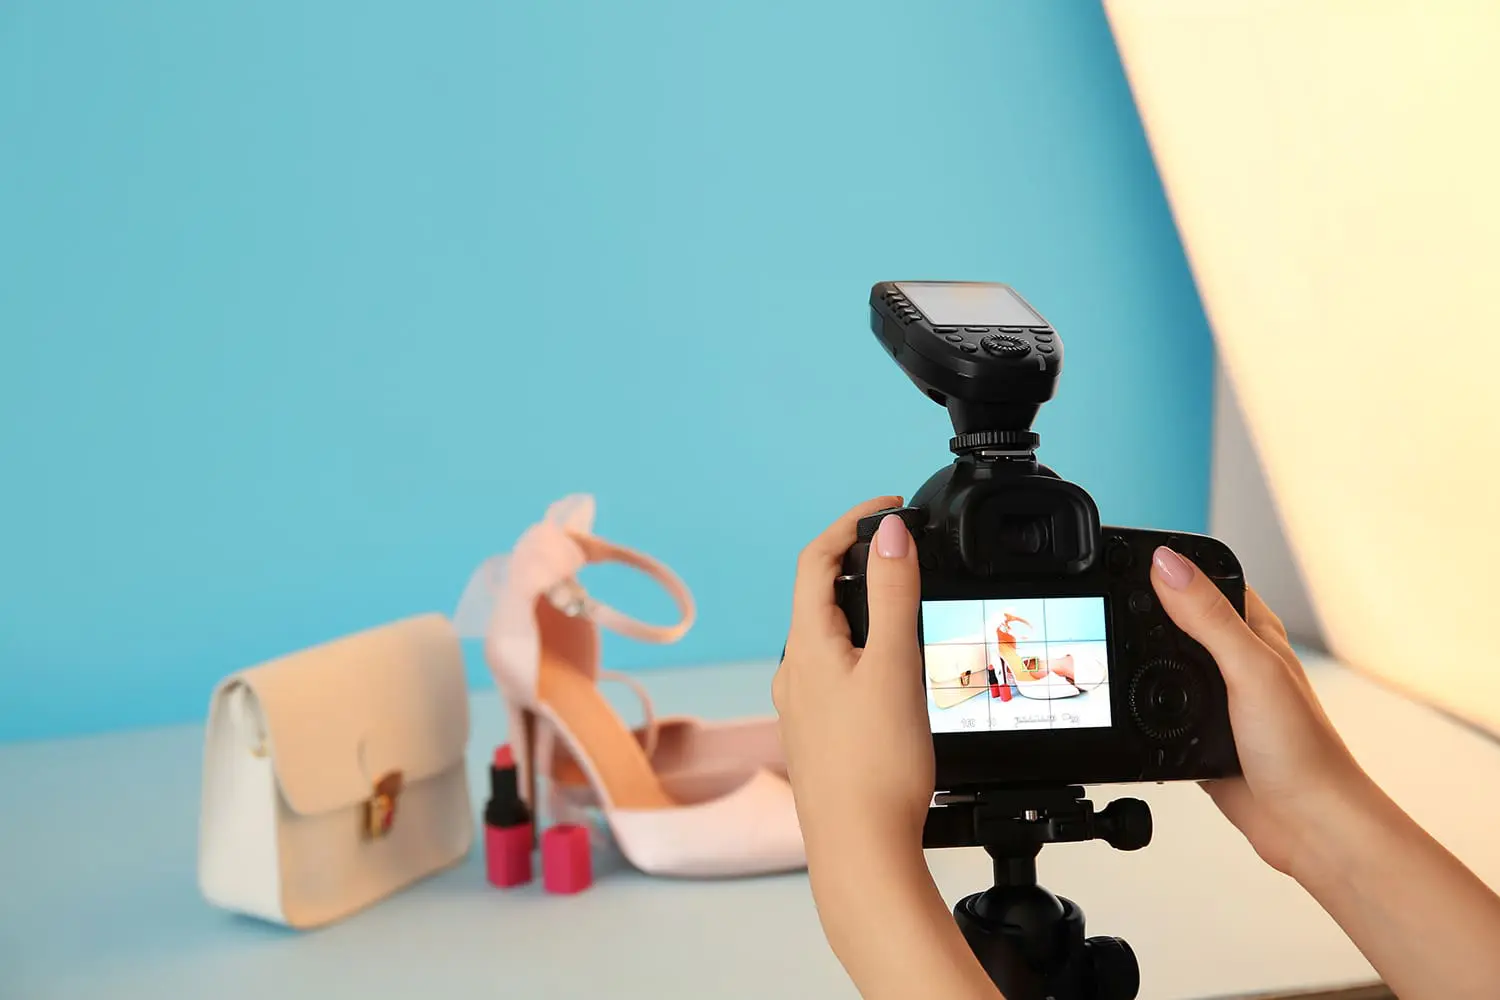
The best light-control settings involve a combination of:
- Manual Mode (M)
- Low ISO
- Medium aperture (f/8–f/11)
- Controlled shutter (1/125 for strobes)
But in terms of camera-specific light-control tools, you should use:
- Exposure Compensation (for natural light)
- Histogram
- Highlight Warning (zebra stripes)
- Light Metering Mode: Spot or Center-weighted
What Happens If Light-Control Settings Are Wrong?
- Overexposed highlights, especially on reflective products
- Loss of detail in labels, stamps, or textured surfaces
- Shadows that are too dark or too contrasty
- Inconsistent exposure across your product catalog
How to Set Up Light-Control Tools Correctly
- Enable Histogram
Keep the graph centered without clipping on either side.
- Turn on Highlight Warning
If parts of the product blink, lower the exposure slightly.
- Use Center-Weighted Metering
This gives the camera a more accurate reading of the product itself.
- Shoot in Manual Mode
This ensures the exposure stays consistent across all shots.
Testing Light-Control Settings
- Examine the histogram for clipping
- Check shiny areas, are they blown out?
- Compare your first and last shot, consistency matters
- Take bracketed exposures if the lighting is tricky
What If You Can’t Use These Light-Control Settings?
- Reduce lighting intensity
- Move light sources farther away
- Add diffusers or softboxes
- Use reflectors to fill shadows
- Switch to continuous lights for easier exposure previews
Comparison (Using vs. Not Using the Setting)
- Correct light control: Balanced exposure, visible texture, controlled highlights
- Incorrect light control: Harsh reflections, crushed shadows, uneven brightness
Advanced Camera Settings for Product Photography
As you move from basic to advanced photography, fine-tuning your camera settings helps you gain complete control over sharpness, exposure, color, and consistency.
These advanced settings are especially helpful when shooting large product catalogs, reflective items, high-detail objects, or commercial campaigns.
Below, you’ll find every advanced setting that matters, what it should be set to, why it matters, and how it affects your camera settings for product photography overall.
Exposure Simulation; What it should be set to: ON
Exposure Simulation allows your LCD or EVF to preview the final exposure before taking the shot. This is especially helpful when using continuous lights.
Why it matters:
- Ensures your exposure is correct
- Helps prevent blown-out highlights
- Saves time in test shooting
- Useful when using Kelvin white balance
When to turn it OFF:
When shooting with strobes, because the simulation shows only ambient light, not flash output.
Drive Mode
Recommended setting: Single Shot (One Shot/Single Frame)
Product photography requires precision, not speed. Burst mode is unnecessary and can cause misfocused or misaligned shots.
When to use Self-Timer (2s):
- To avoid camera shake when shooting with slow shutter speeds
- When manually focusing
- When shooting overhead product shots
Focus Peaking
Recommended setting: ON (High visibility)
Focus Peaking highlights the sharpest areas of your image when using Manual Focus (MF).
This is essential for products with fine textures, engraving, or small surface details.
Important tip:
Choose a neutral peaking color like red or yellow to see it clearly on both light and dark products.
Stabilization
Recommended setting:
- OFF when using a tripod
- ON when shooting handheld (rare in product photography)
Why OFF?
Lens/IBIS stabilization can introduce micro-movement when mounted on a tripod, reducing sharpness.
Auto ISO
Recommended setting: OFF
You need full control over ISO in product photography. Auto ISO increases noise unpredictably and may ruin color accuracy.
If you must use it:
- Set a maximum limit of ISO 200 or ISO 400
- Use Manual Mode so other settings stay controlled
Color Space
Recommended setting: Adobe RGB (for editing)
sRGB (for direct e-commerce upload)
Adobe RGB captures a wider color range, which is ideal for product-based editing workflows.
Workflow rule:
Shoot in Adobe RGB → Edit → Export final files in sRGB for web.
Lens Correction
Recommended setting: ON
Especially important for:
- Jewelry
- Watches
- Boxes
- Bottles
- Anything with straight lines
Lens Correction fixes:
- Barrel distortion
- Chromatic aberration
- Vignetting
If shooting in RAW, most editing software will auto-apply these corrections.
Custom White Balance
Although we already covered WB earlier, here it appears again under advanced tools.
Recommended setting: Custom White Balance using a gray card.
This gives more accurate, brand-true product colors than presets.
Metering Mode
Recommended setting: Center-Weighted or Spot
Matrix (evaluative) metering can be confused by white backgrounds or dark props.
Spot or center-weighted metering ensures consistent exposure on the product itself.
Highlight Warning (Zebra Stripes)
Recommended setting: ON
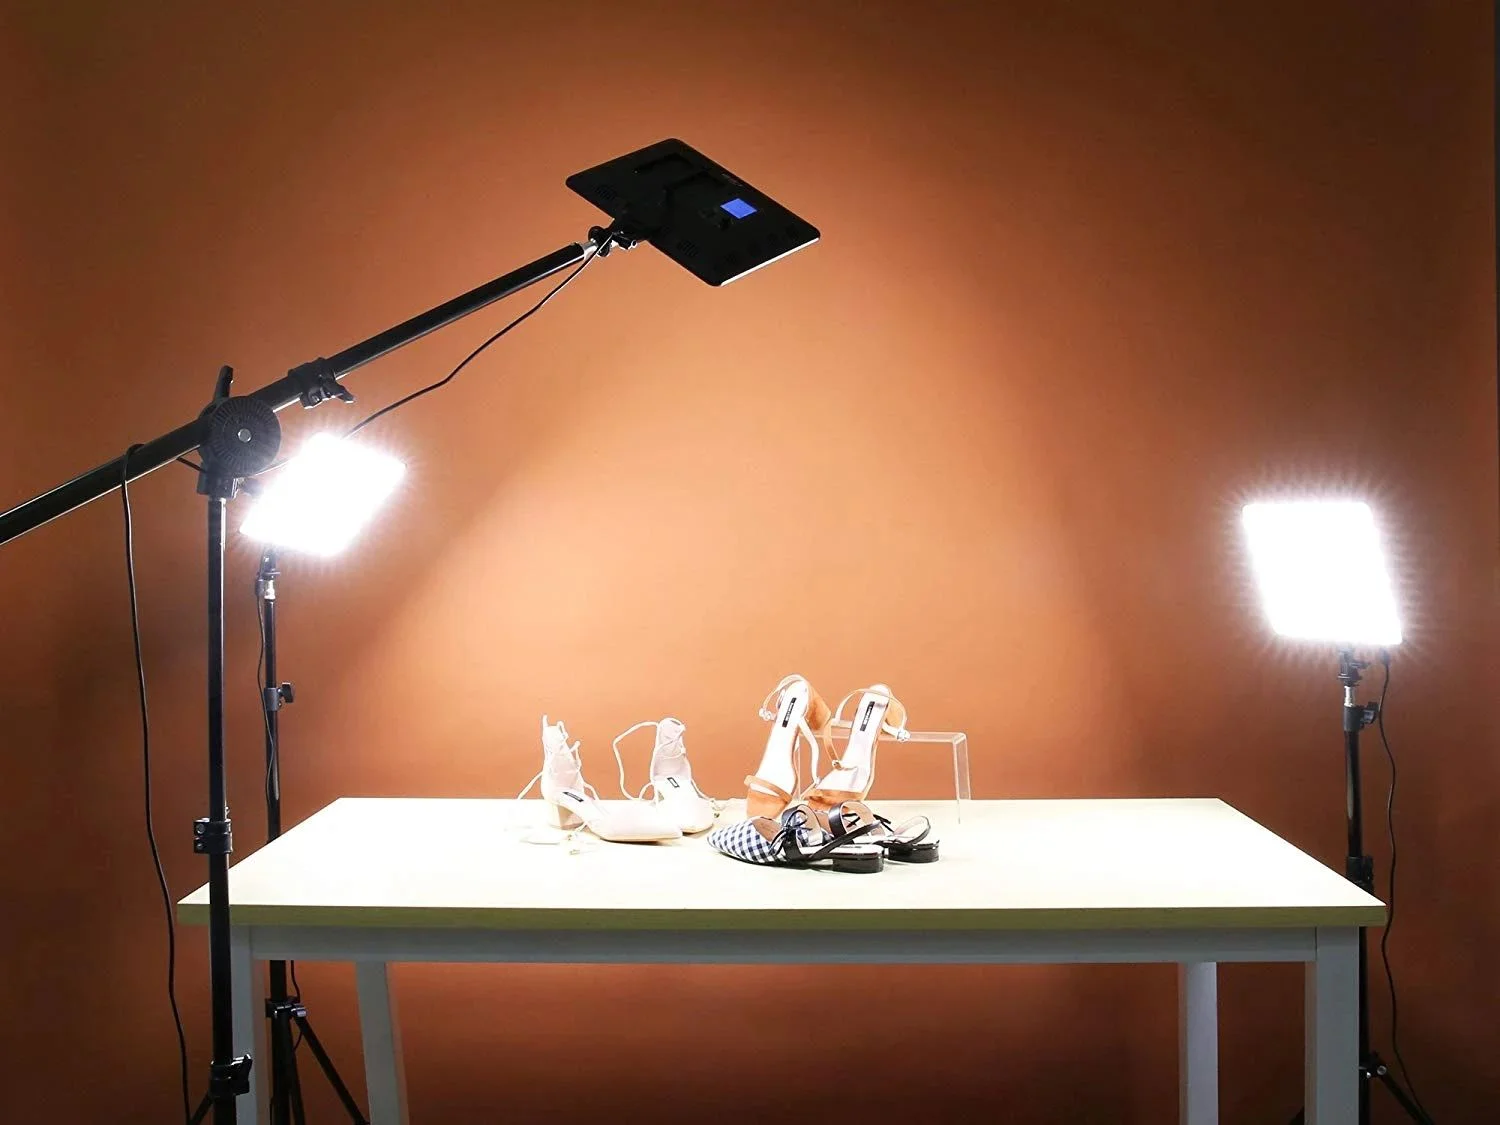
This is crucial for shiny, reflective, glass, or metal products.
If zebra warnings appear:
- Reduce exposure
- Increase distance between lights and product
- Add diffusion to soften highlights
Histogram
Recommended setting: ON
The histogram helps you avoid underexposure and overexposure.
For product photography, aim for:
- A balanced curve
- No clipping on the right (highlights)
- Minimal clipping on the left (blacks)
Silent Shutter
Recommended setting: OFF
Electronic shutters can cause banding with LED or continuous lighting.
Mechanical shutter is safer and more consistent.
Additional Advanced Settings You Should Enable
Live View
Always use Live View for product photography.
It allows:
- Precise manual focusing
- Accurate composition
- Real-time white balance previews
Grid Lines
Turn grid lines ON to avoid crooked compositions, especially with products that have straight edges.
Mirror Lock-Up (for DSLRs)
Enable if shooting with shutter speeds slower than 1/30 to prevent vibration from mirror movement.
Picture Style / Creative Style
If shooting in RAW, this only affects previews, not the final file.
Recommended: Neutral or Standard.
Long Exposure Noise Reduction
OFF, because product photography rarely requires long exposures.
Lighting Setups Every Creator Should Master
Lighting is one of the most defining elements in any visual production. Even the most advanced camera cannot compensate for poor lighting decisions, and creators who truly understand light tend to produce work that feels intentional, polished and emotionally compelling.
This section walks you through a set of essential lighting techniques used by professionals inside the best photography studios in Dubai, helping you build a reliable foundation you can adapt to portrait sessions, commercial campaigns, interviews, lifestyle shoots and even high-end social content.
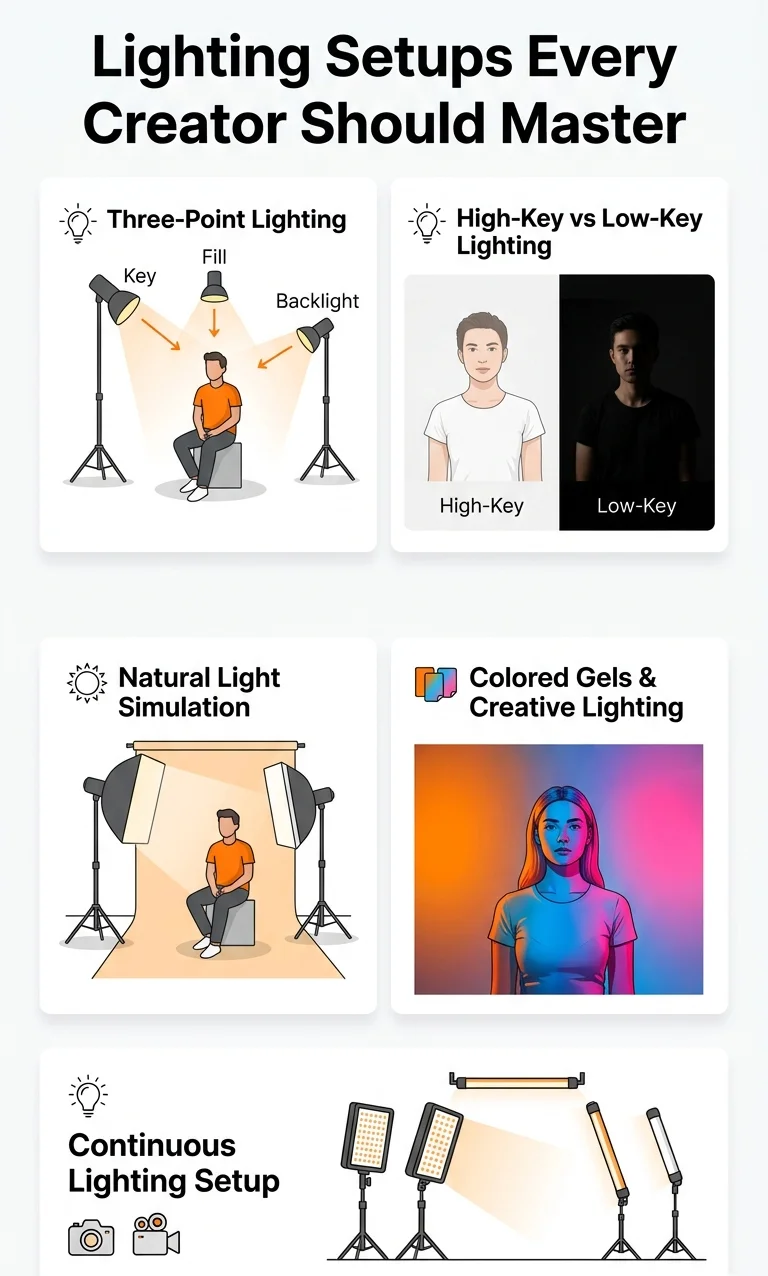
1. Three-Point Lighting for Controlled, Professional Results
Three-point lighting remains one of the most widely used setups worldwide because it offers a clean, balanced look while giving you the freedom to shape your subject using subtle adjustments. The key light defines the overall mood, the fill light softens harsh shadows, and the backlight creates separation from the background.
Inside advanced rental studios, especially those built with flexible grid systems, you can adjust the intensity and direction of each light to craft the exact tone you want. Creators using the best photography studios in Dubai appreciate this setup because it works with nearly every subject type and ensures a predictable, high-quality output.
2. High-Key and Low-Key Lighting for Stylistic Impact
High-key lighting is bright, even and clean, making it ideal for beauty, product and lifestyle content. Low-key lighting, on the other hand, uses deep shadows and controlled highlights to build drama.
These styles require proper modifiers, like softboxes, reflectors and grids, along with a studio that offers stable power distribution and blackout control. When you work in a well-equipped space, experimenting becomes easier, allowing you to dial in contrast, softness and direction without unwanted noise or color shifts.
3. Natural-Light Simulation for Soft Editorial Aesthetics
Many modern studios include large diffusers or specialized lighting kits designed to replicate window light at any time of day. This matters because natural light is beautiful but inconsistent, something that becomes a challenge during long commercial shoots.
Simulated daylight offers the best of both worlds: the softness and warmth of window light with the total control of artificial setups. It’s especially useful for editorial portraits, food photography and lifestyle branding sessions.
4. Colored Gels and Creative Lighting for Mood-Driven Visuals
Colored gels let you shift the emotional tone of your images immediately. Whether you’re building neon-inspired fashion content, cinematic portraits or campaign visuals with bold brand colors, gels offer an accessible way to achieve strong atmosphere.
High-quality studios usually provide a range of gels and RGB lighting fixtures that produce consistent hues without unwanted heat or flicker. This is crucial if you’re shooting video alongside stills, ensuring your footage remains stable and color-accurate.
5. Continuous Lighting for Hybrid Photo-Video Projects
As more creators produce both photography and short-form video content, continuous lighting has become essential. LED panels, COB lights and tube lights allow you to maintain visual consistency across different media formats. Many professionals choose to work in the top rental facilities because they offer flicker-free fixtures, large-output lights and specialized accessories that allow fine-tuning. This leads to cleaner colors, smoother skin tones and more professional-looking footage.
Props, Backgrounds, and Creative Workflow Inside Professional Studios
A studio is far more than four walls and a lighting grid. The tools you choose, from props to backgrounds, play a major role in shaping the storytelling potential of your images. In professional environments, especially inside the best photography studios in Dubai, creators gain access to equipment that helps them experiment, refine ideas, and execute concepts with accuracy and consistency.
This section explores how props, backgrounds and workflow habits can elevate your final visuals.
1. Backgrounds: Building the Mood of the Frame
Backgrounds define context, whether you’re crafting minimalist product shots or dramatic editorial portraits. Seamless paper rolls are perfect for clean commercial work because they eliminate distractions and help your subject stand out. Fabric backdrops provide texture and depth, great for lifestyle or fashion storytelling, while collapsible backgrounds give you quick flexibility during multi-setup shoots.
High-end studios offer everything from neutral color palettes to vibrant tones, as well as larger custom walls for full creative freedom. Working in the best photography studios in Dubai allows creators to switch rapidly between looks without losing time or visual consistency.
2. Props: Supporting Narrative Without Overpowering the Subject
Props can enhance a scene when used intentionally. A single chair can transform a portrait; a set of geometric shapes can elevate product photography; and lifestyle items can help ground a brand story in reality. The key is balance, props should enhance your message, never distract from it.
Professional studios typically provide curated prop selections plus ample space for staging. This enables creators to test variations, adjust composition, and evaluate what feels most authentic to the project’s narrative.
3. Understanding Color Harmony Within the Studio Environment
Color plays a psychological role in visual storytelling. Choosing props and backgrounds that complement your subject, or intentionally clash for artistic effect, can add dimension and emotional weight to your work. In a high-quality rental space, the lighting is color-stable, meaning your chosen palettes reproduce accurately. This precision is one reason many brand photographers prefer working inside controlled environments rather than relying on unpredictable natural settings.
4. Workflow Strategies That Improve Efficiency
A strong workflow allows you to move confidently through a shoot without breaking focus. Professionals usually begin by pre-lighting the space before the client arrives. Then they test angles, adjust exposure, sync triggers and set backup storage.
Throughout the session, they maintain a consistent rhythm: shoot, review, adjust, refine. Having access to a spacious studio, with dedicated styling areas, power outlets exactly where you need them, and flexible setup zones, helps keep everything seamless. This is a major advantage of working in one of the best photography studios in Dubai, where the environment is intentionally designed to support large-scale creative work.
5. Collaboration: The Silent Power Behind Great Visuals
Creativity thrives when teams communicate clearly. Whether you’re working with a makeup artist, stylist, model, or brand representative, the studio environment influences how smoothly your collaboration unfolds.
Good studios offer quiet, organized spaces that make it easy for everyone to focus. When a team feels comfortable and supported, ideas flow faster, and the final images reflect that sense of cohesion. This collaborative energy is one of the reasons professional studios in Dubai have become essential for fashion, commercial and content creators who want to work at an international level.
Editing Essentials, File Management & Final Delivery
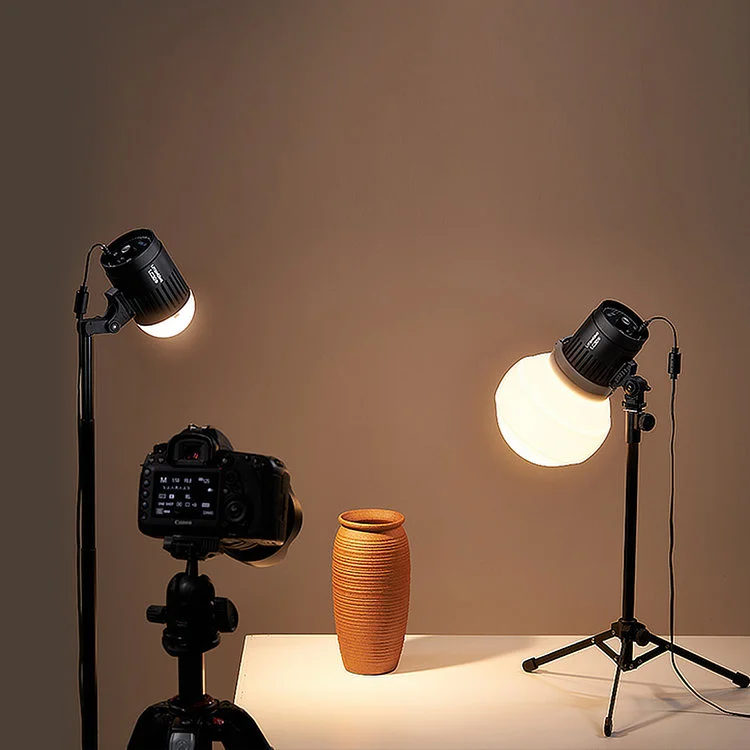
Editing is where your creative vision becomes fully defined. Even the most precisely lit studio session requires careful post-production to ensure the images feel cohesive, intentional, and aligned with your client’s expectations.
This section focuses on the practical editing habits that professionals rely on when working on high-end commercial projects or visual campaigns, especially those produced inside the best photography studios in Dubai.
1. Establishing a Consistent Editing Style
Every creator eventually develops a signature look. Some prefer bright, crisp tones; others lean toward soft, muted palettes; and some embrace bold contrast and cinematic color. Consistency matters because it becomes part of your visual identity. To maintain that consistency across different shoots, build a base preset or editing workflow.
This allows you to start from a unified foundation while leaving room for unique adjustments based on lighting, subject and creative direction.
Working with balanced and controlled studio files, especially those shot in the best photography studios in Dubai, makes this process smoother because your images already share uniform exposure and color accuracy.
2. Color Grading for Mood and Brand Alignment
Color grading is more than simply adjusting hues, it’s a storytelling tool. Brands often require specific tones that match their identity, while editorial work may call for a more atmospheric approach.
Grading helps guide the viewer’s emotional response, shaping how they interpret your images. To achieve consistent and clean color, always shoot RAW and calibrate your monitor regularly.
When your footage and stills come from a studio with reliable lighting and calibrated fixtures, the grading process becomes far more straightforward and predictable.
3. Skin Retouching and Texture Preservation
Modern retouching is not about erasing texture; it’s about enhancing it respectfully. Whether you’re shooting beauty campaigns, portrait sessions, or lifestyle content, the goal is to maintain natural skin details while refining distractions.
Techniques like frequency separation, dodge and burn, and targeted color correction help shape the final look without creating an artificial or “over-processed” feel. Studios with excellent lighting allow you to capture cleaner files, which reduces the need for heavy retouching and preserves a more authentic look.
4. File Management: Protecting Your Creative Work
Many creators underestimate the importance of structured file management until they lose an important project. A professional workflow always includes dual backups, organized folders and clear naming conventions.
Divide your storage into three parts: the master RAW files, the working edited files, and the final deliverables. Using cloud services along with external drives ensures long-term safety. Well-equipped studios often provide secure workstations and fast Wi-Fi to simplify this process, making it easier to offload and organize files immediately after shooting.
5. Delivering a Client-Ready Final Product
Your final delivery is a reflection of your professionalism. Whether you’re providing high-resolution images for a commercial campaign, optimized files for social media, or a gallery for a fashion client, clarity and organization matter. Include both web-ready and print-ready formats, provide a clean folder structure, and accompany deliverables with a brief guide if needed.
Clients appreciate receiving files that are easy to understand and ready for immediate use. The polished results you produce, especially when created inside the best photography studios in Dubai, should feel cohesive, refined, and aligned with the project’s creative vision.
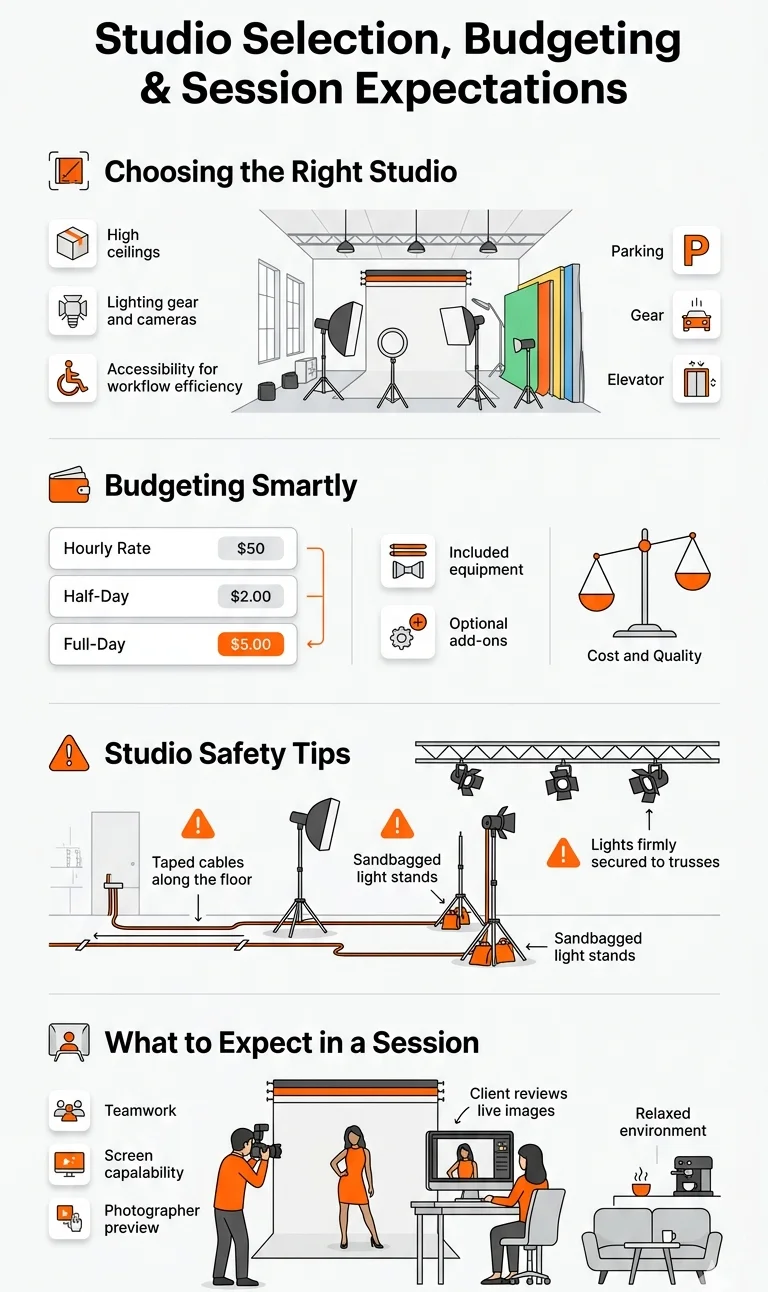
Studio Selection, Budgeting & Session Expectations
Selecting the right studio shapes the quality of your work just as much as your camera or lighting setup. A well-equipped space gives you creative freedom, cleaner files, a smoother workflow and, perhaps most importantly, confidence. In a city full of creative professionals, finding the best photography studios in Dubai can feel overwhelming, but understanding what to look for makes the process far easier and far more intentional.
1.How to Choose the Right Photography Studio
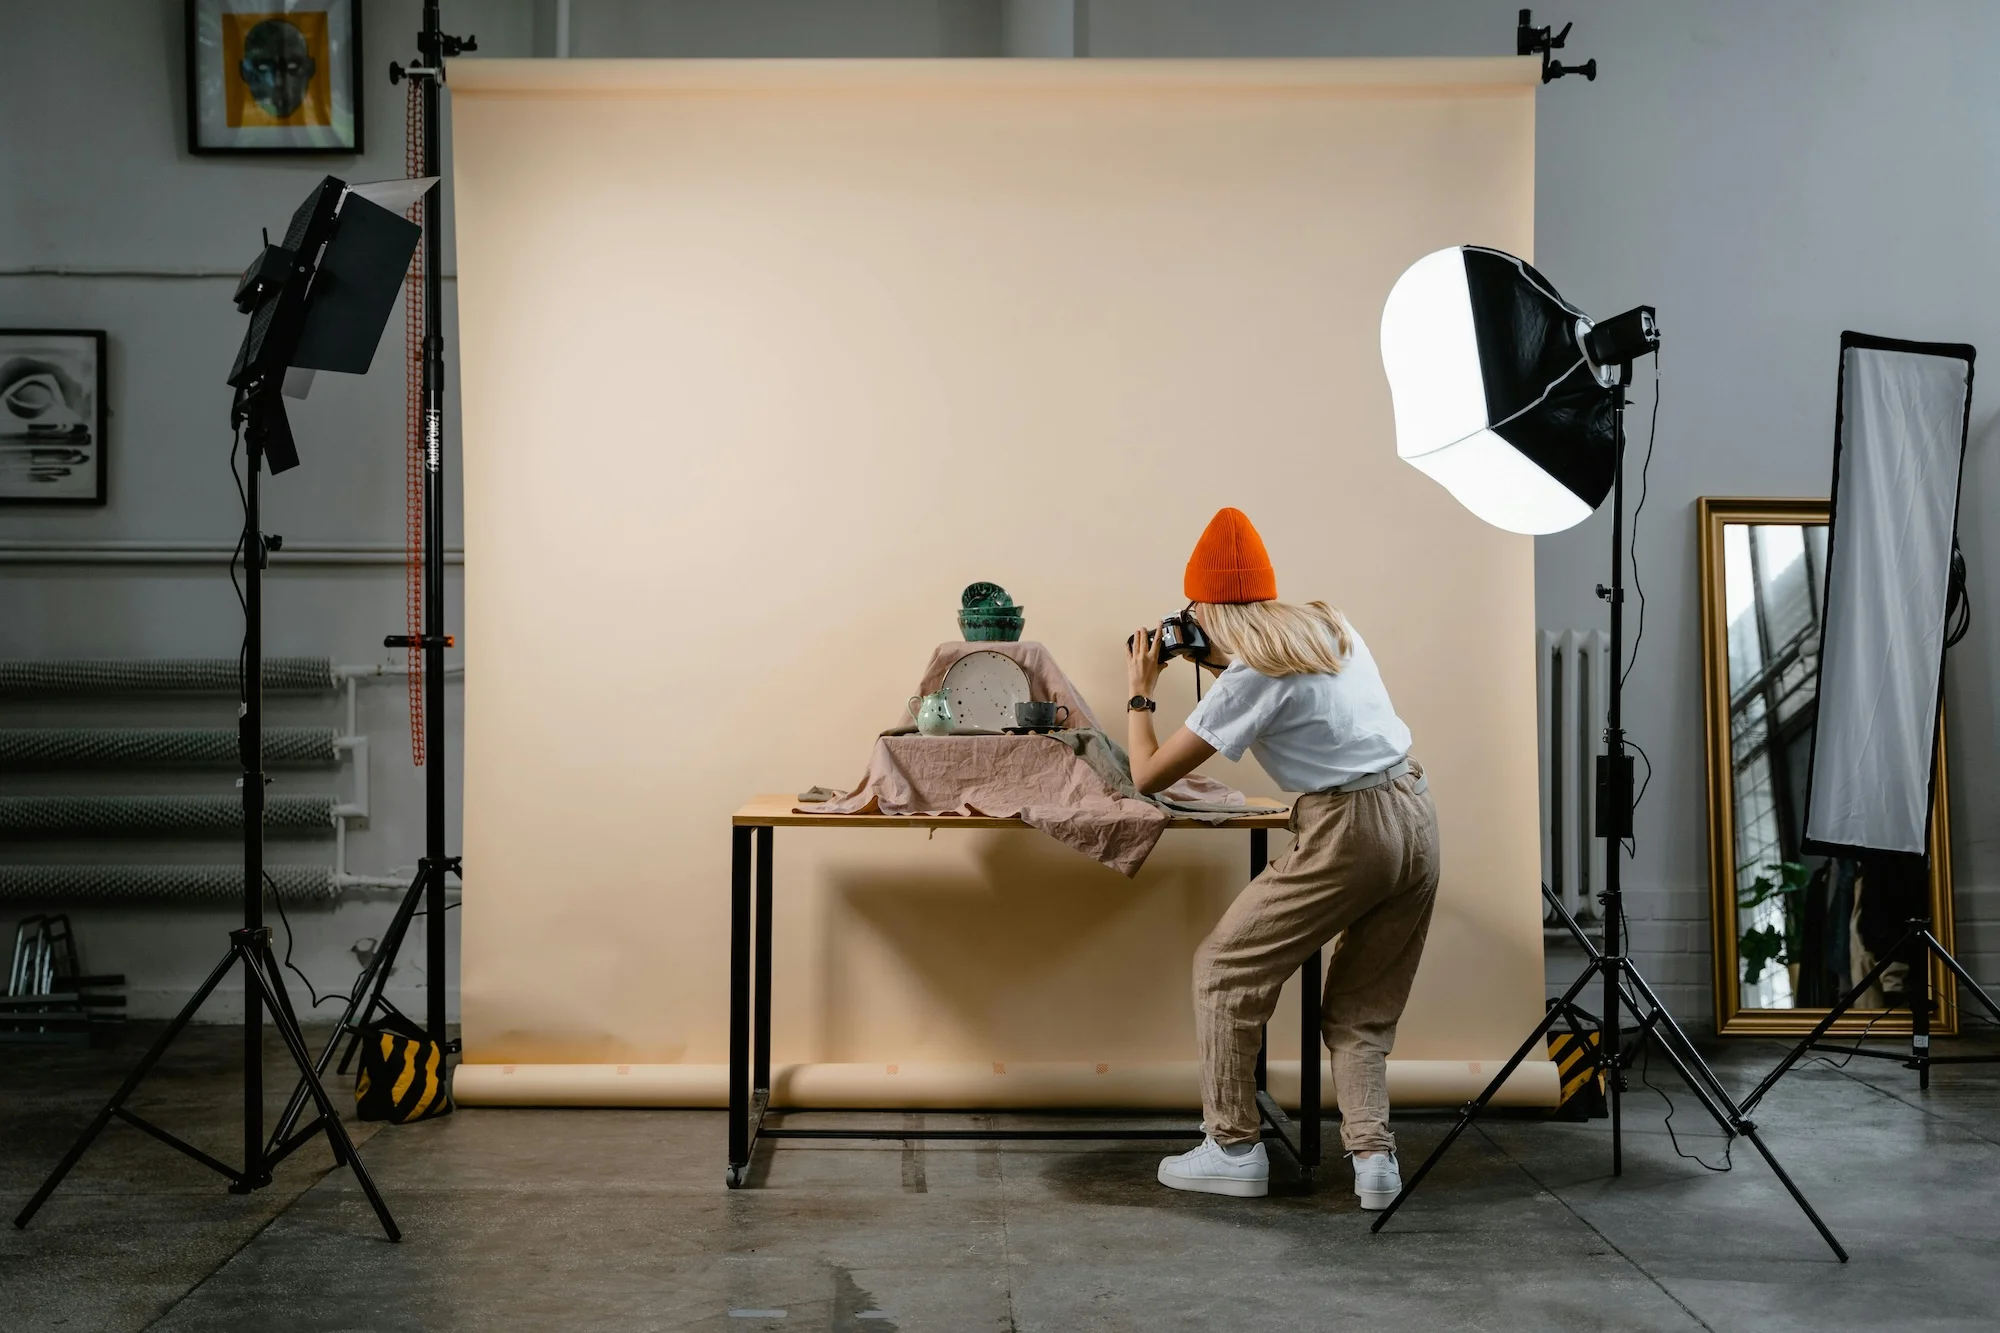
A professional studio is more than four walls and a backdrop. The foundation of a good rental studio lies in thoughtful design. Start by checking the ceiling height, available floor space and the flexibility of the shooting area.
More room means easier control over shadows, light shaping, and movement, essential for both product and portrait work. Look for studios with multiple backdrop options, reliable lighting brands, sturdy grip equipment, and well-maintained modifiers. When you’re working inside one of the best photography studios in Dubai, you’ll notice the difference immediately: the lighting is predictable, equipment is updated, and the workflow feels effortless.
Another factor you should consider is accessibility. Simple things like easy parking, freight elevators or convenient loading zones can save you a lot of time when you’re carrying multiple cases of lighting gear or delicate props.
A studio that values user-friendly design will eliminate unnecessary stress and let you focus on creativity instead of logistics.
2. Budgeting for Studio Rentals Without Compromising Quality
Budgeting is a natural part of every project, and it helps to think of studio rental as an investment rather than a cost. High-quality lighting, clean backdrops, air-conditioned spaces and professional support staff all contribute to a more efficient shoot, and ultimately, better results. While some creators prefer low-cost studios, it’s often the mid-range and premium spaces that deliver consistent reliability.
When choosing among the best photography studios in Dubai, look for transparent hourly rates, equipment included in the rental, and the option to add extra gear if needed.
Many studios offer half-day and full-day discounts, which can significantly reduce the total cost. If you’re shooting multiple clients or planning several projects, consider reaching out and discussing package rates or monthly deals.
Most professional studios are open to collaboration, especially when they recognize consistent work.
3. Safety Tips During Studio Sessions
A safe studio is a productive studio. With cables, stands, power outlets and lighting fixtures everywhere, small accidents can happen quickly if you’re not mindful. Always tape down loose cables, ensure every stand is sandbagged, and check that lights are fully secured before powering them on. If you’re using continuous lights, be aware of heat and keep flammable materials away from the fixtures.
Another often overlooked safety practice is maintaining a clean workflow area. Keep props organized, clear unnecessary items from the walking paths and always communicate with assistants or models before moving large equipment.
The best photography studios in Dubai are designed with safety in mind, they offer sturdy grip gear, stable mounting points and enough space to move confidently without risk.
4. What to Expect During a Professional Studio Session
Your first moments in a professional studio help set the tone for the entire shoot. Most studios offer a brief orientation, showing you key equipment, layout, and available tools, helping you get started quickly and work efficiently.
During the session, expect a calm and structured environment. For commercial projects, clients may be present and can review images in real time through dedicated monitors, allowing smooth communication without disrupting your workflow.
Well-equipped studios also provide comfortable spaces for breaks, giving you time to review shots, collaborate with your team, and maintain focus throughout the session.
Business, Clients & High-End Studio Experience
Mastering studio work goes beyond technical skill; success also depends on how professionally you manage your clients, present your work, and build a consistent brand. These factors shape your reputation, influence who hires you, and determine whether clients return for future projects.
If you want to grow in a competitive market, especially in a creative hub like Dubai, these business-focused practices are essential.
1. Professional Communication: Setting the Tone Before the Shoot
Clear communication is one of the strongest markers of a reliable photographer. Before every session, make sure the client understands the timeline, deliverables, mood board, and styling details. Walking in with clarity prevents last-minute surprises and builds trust.
In the best photography studios in Dubai, this level of professionalism is the standard. Clients expect photographers to be prepared, organized, and ready to guide the creative process. Sending a pre-shoot checklist, confirming call times, and outlining the gear list all show that you take their project seriously.
During the shoot, keep communication open and collaborative. If clients are present, show them key shots as you refine your lighting. If they aren’t, send a small preview after the session to reassure them everything is on track.
2. Managing Expectations and Deliverables
Expectation management is foundational to long-term success. Always clarify:
- How many images will be delivered
- What editing level is included
- Whether retouching is part of the fee
- Estimated turnaround times
- Optional add-ons (extra edits, social-size versions, commercial licensing, etc.)
Providing this information upfront makes clients feel safer and reduces misunderstandings. When you’re shooting in one of the best photography studios in Dubai, your workflow tends to be more efficient, meaning you can meet deadlines with greater consistency and deliver an elevated final product.
3. Building a Portfolio That Attracts High-Quality Clients
Your portfolio is your most powerful marketing tool. Focus on clean, cohesive images that reflect your preferred style. If you want more commercial clients, emphasize polished campaigns and product shots. If you’re aiming for portraits, highlight expressive, well-lit images that show depth and personality.
Here’s what strengthens a portfolio:
- Consistency of Tone:
Your editing, lighting, and subject presentation should feel unified across images.
- Quality Over Quantity:
Ten exceptional images outperform fifty average ones.
- Real-World Applications:
Showcase how your work appears in use, lookbooks, website banners, catalog layouts, or social content.
Shooting in professional environments, especially in the best photography studios in Dubai, naturally elevates your portfolio because the lighting is controlled, the tools are reliable, and the overall tone of the work feels premium.
4. Delivering a High-End Studio Experience
A memorable studio experience begins the moment the client steps inside. Offer a calm, organized workflow; greet them warmly; and provide a clear plan for the session. High-end clients value predictability, structure, and comfort. This is why many photographers prefer working in well-equipped studios that match their professional standard.
A high-end studio experience includes:
- A clean, prepared set before the client arrives
- Equipment tested and arranged neatly
- Reference shots ready for comparison
- Tethering for real-time review
- Backup solutions prepared (spare batteries, memory cards, cables)
- A respectful, calm shooting rhythm
In the best photography studios in Dubai, these details are already integrated into the environment, supporting both you and your client.
5. Post-Shoot Follow-Up and Client Retention
After delivering the final images, don’t disappear. Adding a small follow-up message helps maintain the relationship and encourages future bookings. Ask if they need different file formats, additional retouching, or if they’re preparing another campaign soon.
Clients value photographers who stay engaged, understand their brand, and offer consistent quality, those are the qualities that build long-term creative partnerships.
Mastering Camera Settings for Product Photography
We’ve covered an extensive range of camera settings essential for professional product photography. From aperture, ISO, shutter speed, and image format to white balance, focus modes, light control, and advanced camera tools, every detail matters in crafting sharp, vibrant, and high-quality images.
We also explored how to optimize DSLR and mirrorless cameras, automated setups, and specific situations like white backgrounds, model shots, or props.
Beyond technical settings, we emphasized workflow, studio choice, lighting techniques, props, portfolio-building, and client management to ensure your photography looks polished, professional, and cohesive.
By combining precise camera settings with thoughtful planning, lighting, and workflow, you create images that meet client expectations, highlight your subject perfectly, and save time in post-production.
Proper preparation and knowledge ensure your photos look consistent, accurate, and visually appealing across every platform.
Elevate Your Product Photography with Helio Studio in Dubai
Looking to capture professional, high-quality product photos without worrying about equipment or studio setup? Helio Studios offer top-tier rental spaces, advanced cameras, lighting setups, and support gear for photographers and creators in Dubai.
Whether you’re shooting small products, fashion campaigns, or lifestyle scenes, Helio provides:
- Flexible, fully-equipped studio spaces
- Professional lighting, modifiers, and props
- High-end cameras and accessories
- Support for both photo and video projects
Book a session today and experience why professional photographers trust Helio to create premium visuals effortlessly. Elevate your work, save time, and focus on creativity, everything else is ready for you.
Final Thoughts
Mastering camera settings in product photography goes beyond memorizing values, it’s about understanding how light, composition, and technique work together. Precise control of aperture, shutter speed, ISO, and focus ensures every product is captured with clarity and intent.
Strong results also depend on the right workflow, equipment, and studio environment. Controlled lighting, reliable gear, and a professional setup allow photographers to produce consistent, high-quality images tailored for e-commerce, advertising, and branding.
By combining technical precision with a well-structured production process, photographers can consistently deliver polished, impactful visuals. For creators in Dubai, Helio provides the space, equipment, and support needed to bring that level of work to life.