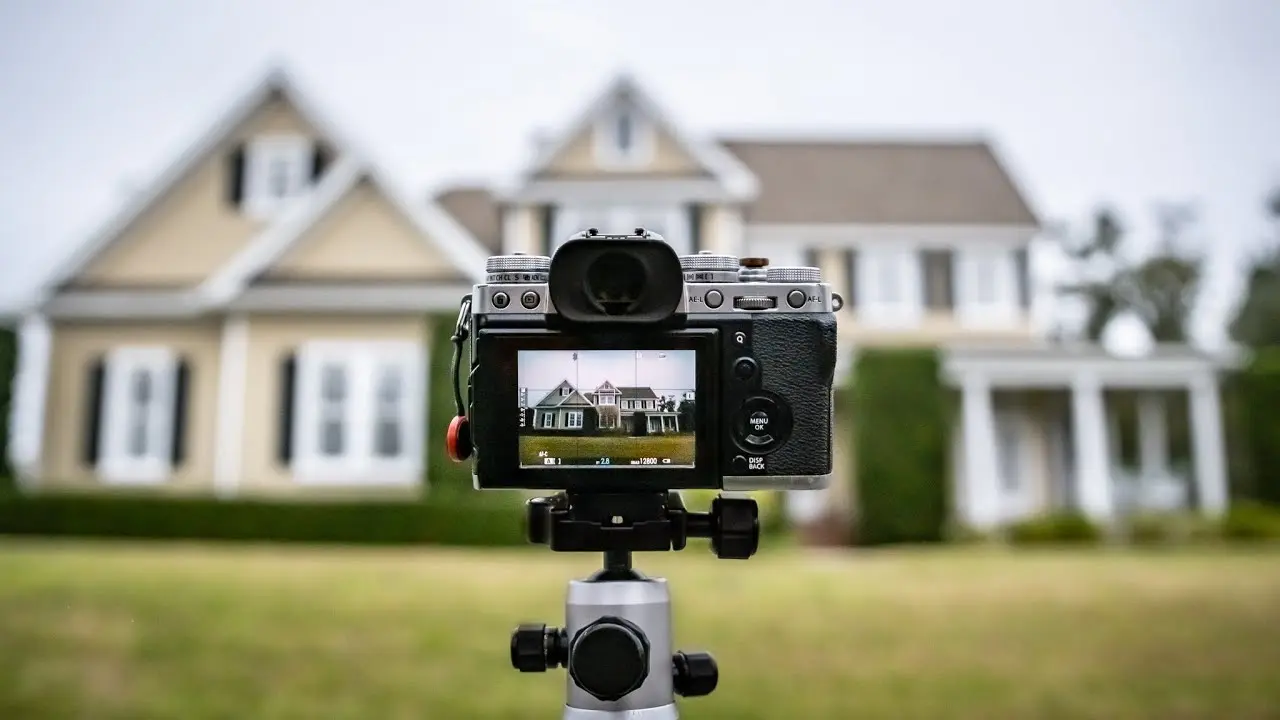
Real estate photography in Dubai has a style of its own. Between glass towers, sun-lit villas, high-contrast interiors, and waterfront-facing apartments with bright outdoor views, getting the camera setting for real estate photography right can make or break the result. In a market where listings move fast, and client expectations are extremely high, one badly exposed image can give the wrong impression about a property’s value.
In this guide, we are going to walk you through the best camera settings for real estate photography, why they matter, how they affect your images, and exactly what to adjust depending on your shooting situation.
Basic Camera Settings for Real Estate
Before diving into specific scenarios, it helps to understand why the camera settings for real estate photography matter so much. When your settings are correct, interior spaces look brighter, wider, and more inviting. Colors appear natural, windows show real views rather than a blown-out white patch, and your final image looks polished.
But when your settings are wrong, you tend to see the following problems:
- Overexposed windows
- Yellow or dull room colors
- Shadows that make the room look smaller
- Grainy images
- Warped lines and soft details
A good camera setting for real estate photography solves all of these problems because it balances light, maintains clarity, and helps the room appear exactly as it feels in real life.
The Exposure Settings You Must Control in Real Estate Photography
Exposure settings (ISO, aperture, shutter speed) are the foundation of every real estate photo.
What is the best setting?
The general exposure combination most Dubai photographers use is:
- Aperture: f/8–f/11
- ISO: 100–400
- Shutter: 1/2s to 1/60s depending on light
What happens when you ignore proper exposure?
If exposure is off:
- Rooms look darker than they actually are
- Window views get blown out
- Soft details appear fuzzy
- Colors shift to an unpleasant tone
Why indoor light is challenging in real estate photography
Indoor spaces often mix daylight, LED, and warm tungsten. This creates patches of brightness and shadows. A smart exposure solution is to use as camera setting for real estate photography in this scenario:
- Aperture f/8
- ISO 100–200
- Slow shutter (1s–4s on tripod)
This maintains clarity without introducing grain.
Why exposure settings change depending on the situation
Every room has a different mix of natural and artificial light. For example:
- A room with big windows on a sunny Dubai afternoon requires ISO 100 and faster shutter speeds
- A dim hallway may require ISO 400 and slower shutter speeds
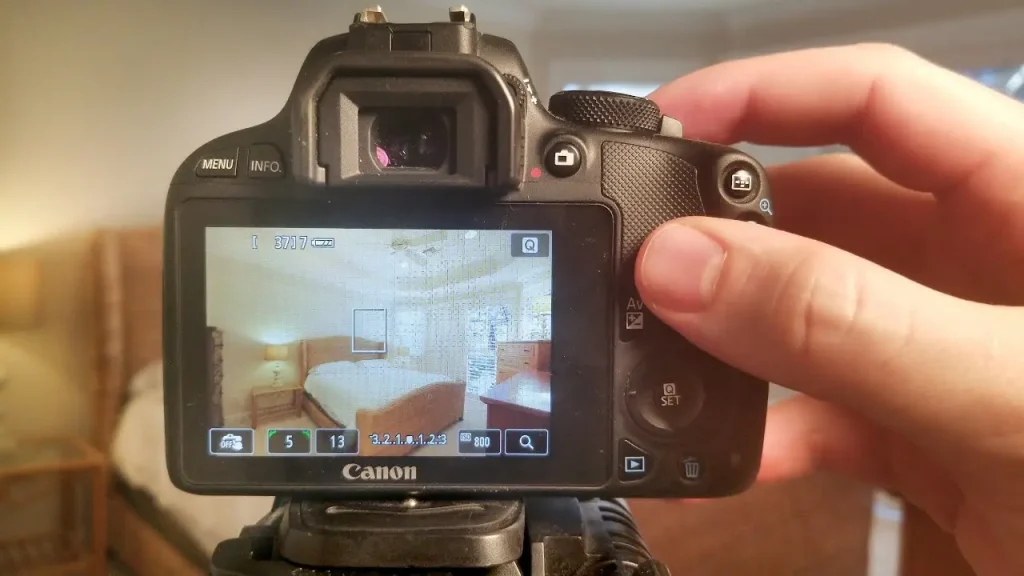
How to set it up
- Switch to Manual Mode
- Set ISO 100
- Set Aperture f/8
- Adjust shutter until the exposure meter hits “0”
What if you cannot use this setting?
If you cannot slow your shutter because you don’t have a tripod, raise ISO to 400–800.
Comparison Images
- Using proper exposure: windows retain details, room is evenly lit
- Improper exposure: bright windows, dark shadows, uneven colors
Best Metering Mode Settings for Real Estate Photography
Metering is a small part of your camera setting for real estate photography, but it has a big impact on how the camera reads light inside a room. With the best camera settings for real estate photography, choosing the right metering mode helps you keep both windows and interiors properly exposed.
What metering mode should I use for real estate photography?
Use Evaluative/Matrix metering for most interiors. Metering helps guide exposure, but it cannot fully protect bright window highlights on its own. You will still need HDR bracketing or multiple exposures anytime sunlight is strong.
What is the best mode?
Evaluative / Matrix metering is the only camera settings you need for real estate photography because it measures the whole frame.
When to use Spot metering?
Most real estate photographers rely on HDR bracketing instead of Spot metering, since bracketing automatically captures both window highlights and interior shadows more reliably.
Why metering matters for windows + shadows
Without proper metering, your camera will struggle to balance the bright Dubai sunlight outside and the interior inside.
What happens if you ignore metering?
- Washed-out windows
- Over-bright ceilings
- Loss of detail
How to set it up
- Go to your camera’s Metering Mode menu
- Select Matrix / Evaluative
- Switch to Spot only when windows overpower the interior
What if you cannot use this setting?
Use bracketing to fix exposure differences.
Comparison Images
- With proper metering: room and windows both visible
- Without it: windows become pure white
Note: Even with correct metering, indoor real estate scenes with bright windows almost always require HDR, because the dynamic range exceeds what the camera can record in one exposure.
Focal Length, Camera Height and CPL Filters for Real Estate Photography
Choosing the right focal length is crucial for capturing the full space without distortion. Wide-angle lenses (14–24mm on full-frame cameras) work best for small rooms and interiors, while standard lenses (24–50mm) are ideal for larger spaces or exteriors.
Camera height also plays a big role in how spacious a room appears. Generally, positioning the camera around 1.4–1.6 meters (eye level) helps maintain natural proportions and avoids overly distorted perspectives.
Using a CPL (Circular Polarizer) filter can reduce reflections on windows, glass, or shiny surfaces. It also enhances colors, making skies, water, or outdoor greenery more vibrant. Remember to adjust the filter while looking through the viewfinder to achieve the desired effect.
Best ISO for Real Estate Photography
Choosing the correct ISO helps ensure that your interiors look clean, sharp, and professionally lit. Even the best camera settings for real estate photography won’t look right if the ISO is too high or too low, because it affects both clarity and noise. When shooting with a tripod, keep the ISO at 100 and use a longer shutter speed to avoid unnecessary noise while maintaining perfect exposure.
Do I need HDR for real estate photography?
Not always, but highly recommended for interiors.
What is the best ISO for real estate photography?
ISO 100–400 is ideal.
Ideal ISO ranges
- ISO 100 has the highest clarity
- ISO 200–400 is for slightly darker rooms
- ISO 800 works best with twilight exteriors
When to use ISO 100
Bright interiors with lots of natural light.
When to use ISO 200–400
Rooms with mixed lighting or darker corners.
When ISO 800 is needed
At dusk or twilight when shooting outdoor views of villas, pools, or rooftops.
What happens when ISO is ignored?
Low ISO only risks blur when shooting handheld. In real estate interiors, you should always use a tripod, so low ISO does not cause blur as long as the camera is stable.
How to set ISO
- Manual Mode → ISO menu → choose 100
- Increase only if shutter speed becomes too slow to manage
Comparison Images
- Low ISO: crisp details
- High ISO: visible grain
What Aperture to Use for Real Estate Photography
Aperture is one of the most important parts of any solid camera setting for real estate photography, because it controls how sharp and clear your entire scene appears. Even with the best camera settings for real estate photography, the wrong aperture can leave parts of the room soft or out of focus.
What aperture is best for real estate photography?
The best real estate photography settings for aperture are f/8–f/11.
What aperture should I use for real estate photography?
Use f/8 for most rooms; f/11 for larger spaces.
Why f/8–f/11 is standard
It gives the best depth and sharpness across the entire frame.
When to use f/5.6
For small bathrooms or tight spaces, it’s still best to keep the aperture between f/8 and f/11 to maintain sharpness across the room. If extra light is needed, consider using additional lighting rather than opening the aperture further.
When to use f/16
Exterior shots where you want everything from the front yard to building façine focus. While f/16 increases depth of field, most lenses become slightly softer due to diffraction at this aperture. Use f/8–f/11 for maximum sharpness, and switch to f/16 only when necessary.
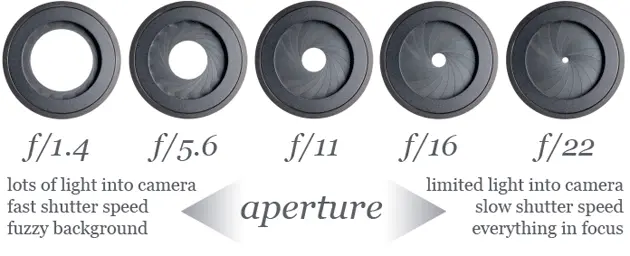
What happens without proper aperture?
Too wide (f/2.8) leads to blurry edges
Too narrow (f/22) can cause reduced sharpness from diffraction
How to set aperture
- Aperture Priority Mode (A or Av)
- Select f/8
- Let camera adjust shutter
Comparison Images
- Correct aperture: all lines straight and sharp
- Incorrect: edges appear soft
Best Shutter Speed for Real Estate Photography
Shutter speed is one of the key parts of any proper camera setting for real estate photography, mainly because it controls how bright and sharp your images turn out. Even with the best camera settings for real estate photography, choosing the wrong shutter speed can leave your photos either too dark or blurry.
What shutter speed to use for real estate photography?
1/2s to 1/60s depending on light are the best real estate photography settings.
What should my shutter speed be for real estate photography?
Use slower shutter speeds indoors on a tripod.
Why shutter speed varies
Different light levels require different shutter speeds.
Normal interior range
Depending on room brightness, interiors may require 1–8 seconds. This is completely normal as long as you are using a tripod.
Exterior & Twilight
- Sunny exteriors: 1/125s – 1/400s
- Twilight: 1/4s – 1/30s
What happens without a proper shutter?
Too fast creates dark rooms, while too slow without a tripod causes motion blur.
How to set it
Set shutter after choosing ISO + aperture.
If you can’t use slow shutter
Raise ISO to 200–400.
* Important Reminder
A tripod is absolutely required.
HDR and Bracketing for Real Estate Photography
HDR (High Dynamic Range) and bracketing are techniques that help capture both bright and dark areas of a scene at the same time. In real estate photography, especially in Dubai homes where sunlight streams through large windows, the difference between indoor and outdoor lighting can be extreme. Without HDR, bright areas like windows may become completely blown out, while shadows lose detail.
With bracketing, the camera takes several shots at different exposures (usually 3–5 with a 2-stop difference). These images are then combined in post-processing to create a final photo that preserves details in highlights, midtones, and shadows.
If shooting HDR isn’t possible, you can use spot metering on the windows and adjust the exposure for the rest of the room during editing. In conclusion:
HDR ensures you capture:
- Bright windows
- Midtones
- Shadow details
Best HDR settings
- 3 to 5 bracketed exposures
- 2-stop difference
- ISO 100
- Aperture f/8
What happens if you skip HDR?
Windows will blow out completely.
What if you cannot shoot HDR?
Use spot metering and exposure for the window.
Image Format Setting for Real Estate Photography
Should I shoot real estate photos in RAW?
Yes, RAW is strongly recommended.
Why RAW?
RAW gives more flexibility with:
- Color correction
- Window recovery
- White balance
When to shoot JPEG
- Quick, low-budget shoots
- When client needs fast delivery without editing
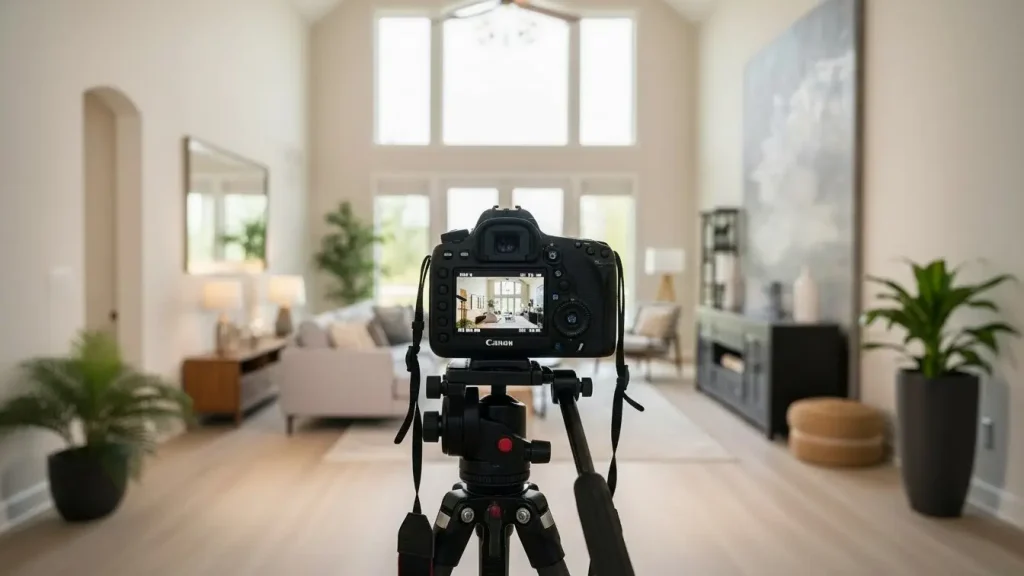
Situation-Based Camera Settings for Real Estate Photography
Dubai homes can shift from bright living rooms to dim corridors in seconds, so your camera settings must adapt to each space. Using the right settings helps you manage these changes without losing detail or color.
The Perfect Camera Settings for Indoor Real Estate Photography
Indoor spaces often require the most precise camera settings, especially in mixed lighting or tight rooms. The right settings can make the entire space appear brighter, cleaner, and more inviting.
Best camera settings for indoor real estate photography
- Aperture: f/8
- ISO: 100–200
- Shutter: 1–2 seconds
- Metering: Evaluative
- Format: RAW
The Best Camera Settings for Interior Real Estate Photography
Getting interior shots right is crucial because these images determine how spacious, clean and inviting a property appears. In a competitive city like Dubai, where clients expect crisp, polished photos, choosing the right camera settings for real estate photography makes a noticeable difference. What you’ll find here are practical and reliable adjustments.
What is the best camera setting for interior photography?
Aperture f/8, ISO 100–200, tripod, and HDR bracketing.
Here is a simple table for the only camera settings you need for real estate photography when shooting different types of spaces:
| Interior Space | Aperture | ISO | Shutter | Notes |
| Small Rooms | f/5.6–f/8 | 100–200 | 1–3s | Wider aperture for more light |
| Large Open Rooms | f/8–f/11 | 100 | 1–2s | Ensures overall sharpness |
| Kitchens | f/8 | 100–200 | 1–2s | Watch for mixed lighting |
| Bedrooms | f/8 | 100 | 1–2s | Use HDR for window views |
| Hallways | f/8 | 200–400 | 1–3s | Often darker and narrow |
Best Camera Settings for Exterior Real Estate Photography
Exterior real estate photography is all about light, which in Dubai can shift from extremely bright daylight to vibrant twilight within minutes. This is why choosing the correct camera setting for real estate photography matters so much for outdoor shots. For the strong afternoon sun or the softer tones of sunset, the best real estate photography settings will help you maintain clean details, sharp architectural lines, and natural colors.
Sunny Day
- f/11
- ISO 100
- Actual shutter speed can vary depending on the building’s color, sun direction, and time of day. The recommended range (1/125s–1/400s) is typical, but may require slight adjustments.
Twilight
- f/8
- ISO 200
- Shutter 1/4s – 1/30s
Night
- f/8
- ISO 400
- Shutter 1–4s
Work With Dubai’s Real Estate Content Experts
If you’re looking for property photos that genuinely help listings stand out in Dubai’s competitive market, our team at Helio Marketing and Advertising Agency can handle everything from interior shoots to full real estate content packages. We guide agents, developers, and property managers with precise recommendations, and we produce polished visual content that elevates every listing.
Reach out to Helio today, and let’s create images that truly represent the property’s value.
Summary
Choosing the right camera setting for real estate photography takes some practice, but once you understand the principles ISO, aperture, shutter speed, metering, HDR, and format the whole process becomes much more predictable.
Whether you’re shooting interior bedrooms or sunset exteriors, these settings ensure clarity, color accuracy, and professional-looking results. By applying the techniques outlined in this guide, you can produce high-quality real estate photos suitable for Dubai’s fast-paced property market.
FAQs
Should I use manual mode or aperture priority?
Manual mode is ideal; Aperture Priority works for exteriors.
What camera settings should you use for real estate photography?
Aperture f/8, ISO 100–200, HDR, RAW.
What is the best camera setting for real estate photography?
Manual mode: f/8, ISO 100, tripod, HDR.
What aperture is best for interior photos?
f/8–f/11.